tl;dr
- Open gimp
- Create new 32 px / 32px image, paste there your icon (you may need to rescale it with Tools->Transform tools -> scale) or draw whatever you want. You may want to open a toolbox with Ctrl + B.
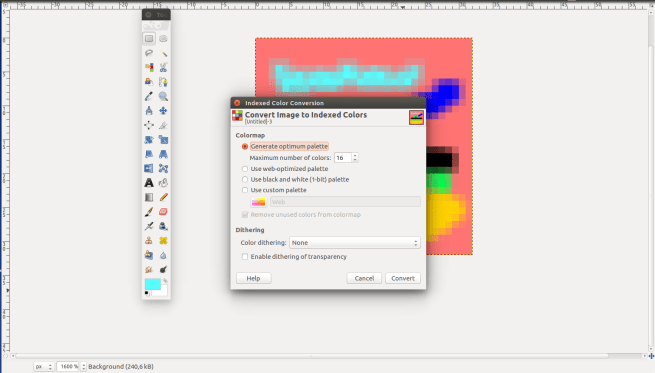
- Set image to use indexed pallette with maximum of 16 colors
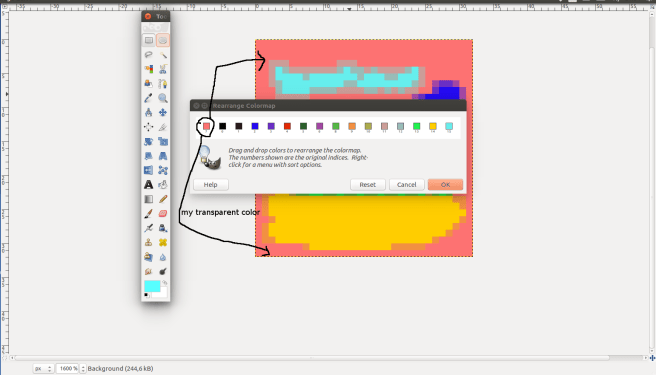
- first colour of bitmap would be transparent when rendered on NDS menu, so set it as first in “colors->map->rearrange map”
- Save in .bmp format BUT you MUST check the “compatibility options” -> “do not write color space information”
- In your projects’ Makefile fill GAME_ICON property with path to your icon
- Build your nds project, put it on R4 or something else and enjoy
detailed:
- Srsly
- File -> New, then in window which appears set width / height. No need to change anything in “Advanced options”.

Drawing something ugly:
3. Image -> Mode -> Indexed. Set max colours to 16. Again, no need to change anything else.
4. As I said, choose whatever color that would be unique (you don’t use it in your icon to draw something) – it will stand for the transparence layer. I have arbitrarily choosen this red-pinkish color. Now you have to arrange it to be the first color in the icon palette.
Do this by Colors -> Map -> Rearrange colors map.
Just drag and drop your color to the first place:
5. Ctrl + E, name it as something.bmp, click Export,
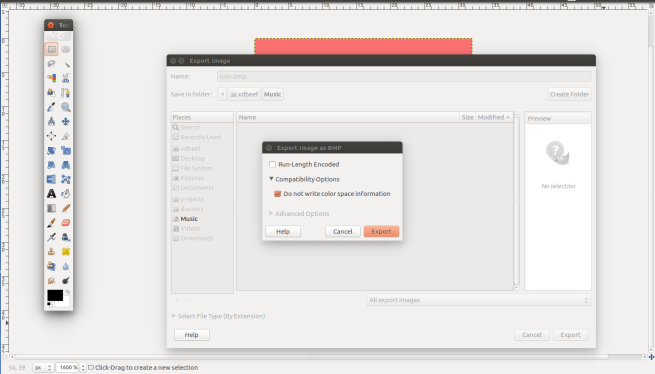
Click Export again.
6.

That’s it, finished, you can now build your .nds file with custom icon.
