This post is part of my series on Android live wallpapers.
Visit my other blog posts where I cover creating live wallpapers in:
- Unity: https://dbeef.lol/2019/09/29/creating-live-wallpaper-in-unity/
- LibGDX: https://dbeef.lol/2019/09/29/creating-live-wallpaper-in-libgdx/
Templates for all three technologies are on my repository:
https://github.com/dbeef/CreatingAndroidLiveWallpapers
Open your Android Studio, then on your menu bar, select:
File -> New Project -> Add No Activity.
Just like in the image below:

Then, name your application as you wish and choose Java as a language (could be in Kotlin, won’t differ in basis of what I cover in this post).
Click finish when you’re done.
Open Project view on your left-side menu, and in path:
app/src/main/java/yourpackagename
Create files:
SimpleWallpaperActivity.java
SimpleWallpaperService.java
Just like on the image below:

Why do we need an Activity and a Service? Android SDK defines them as:
An Activity is a single, focused thing that the user can do. Almost all activities interact with the user, so the Activity class takes care of creating a window for you in which you can place your UI with
setContentView(View). (…)
The Activity class is an important part of an application’s overall lifecycle, and the way activities are launched and put together is a fundamental part of the platform’s application model. For a detailed perspective on the structure of an Android application and how activities behave, please read the Application Fundamentals and Tasks and Back Stack developer guides.A Service is an application component that can perform long-running
operations in the background, and it doesn’t provide a user interface.
Another application component can start a service, and it continues to run
in the background even if the user switches to another application.
Additionally, a component can bind to a service to interact with it
and even perform interprocess communication (IPC). For example, a service
can handle network transactions, play music, perform file I/O, or interact
with a content provider, all from the background.
So adding a single Activity is required, and Services are optional and needed in special cases.
From Service’s description one can understand, why is it that live wallpapers need them:
they have to do work in background, unlike most of other Android applications or games.
SDK provides special kind of Service – WallpaperService, that once implemented, will do the effort of drawing when visible.
Documentation describes it as:
A wallpaper service is responsible for showing a live wallpaper behind applications that would like to sit on top of it. This service object itself does very little — its only purpose is to generate instances of
Engineas needed. Implementing a wallpaper thus involves subclassing from this, subclassing an Engine implementation, and implementingonCreateEngine()to return a new instance of your engine.
Now, knowing what the files we’ve just created are supposed to contain, let’s provide some source.
SimpleWallpaperActivity.java will be as simple, as:
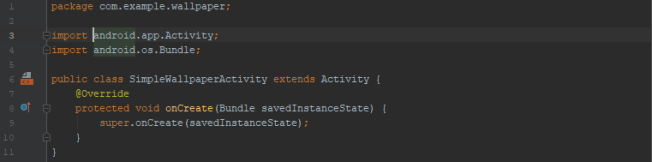 …since we don’t need our wallpaper to contain any UI, when running as an application (yes, it will still be runnable and visible in your device’s apps list, and besides, this activity will be run when user requests wallpaper’s settings, as you will find out later).
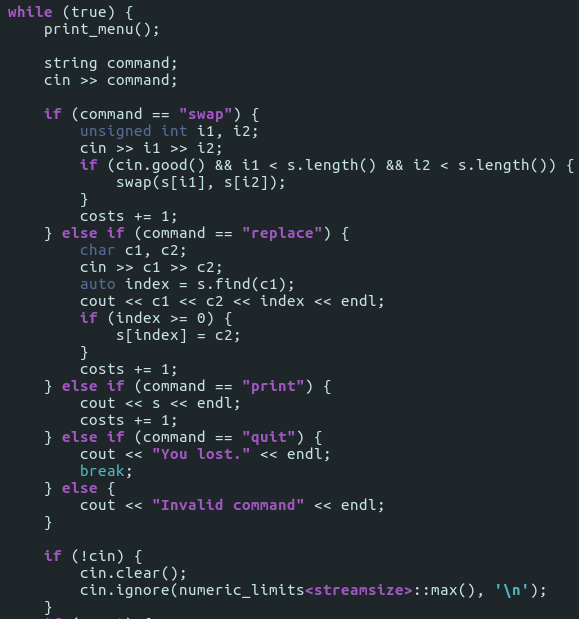
Real work is done in SimpleWallpaperService.java:

For simplicity I did not bother to use OpenGL in this example, so you will have to do with draw calls to Android’s Canvas instance.
Instances of NDK’s Handler and Java’s Runner are created to handle drawing outside of overriden methods – handler acts as a queue for draw() commands.
Under src/main/res/xml/ create wallpaper.xml:

The comment I added in the xml itself says everything.
Finally, create AndroidManifest.xml:
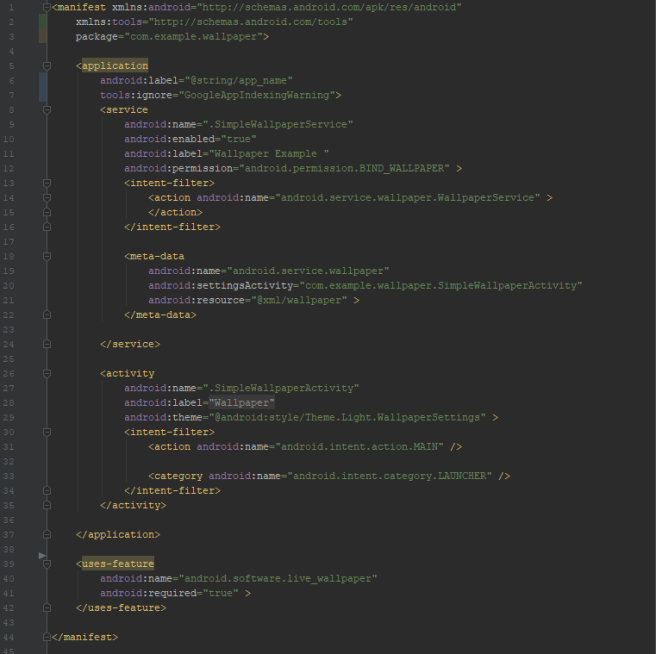
There are 3 notable points in this manifest file, that distinguish if from an ordinary application:
- uses-feature tag in line 39, that requires a device capable of live wallpapers
- service tag starting from line 8, requiring BIND_WALLPAPER permission
- meta-data tag, that points to the activity that is run when user requests wallpaper’s settings
Now you can build and install the wallpaper.
As I mentioned, code is on my repository:
https://github.com/dbeef/CreatingAndroidLiveWallpapers


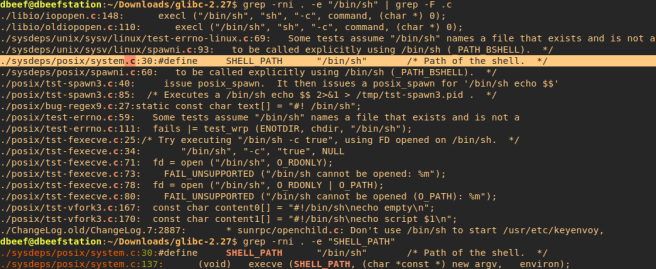 grep -rni . -e “/bin/sh” causes recursive searching of “/bin/sh” in current path.


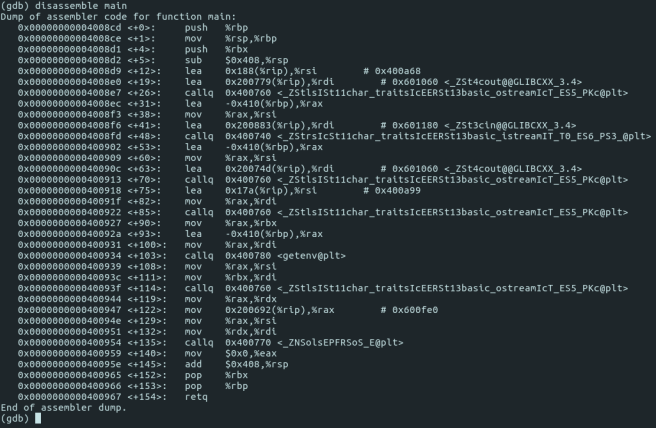


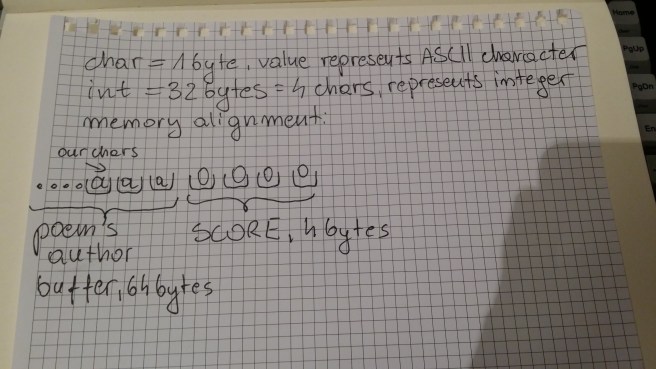
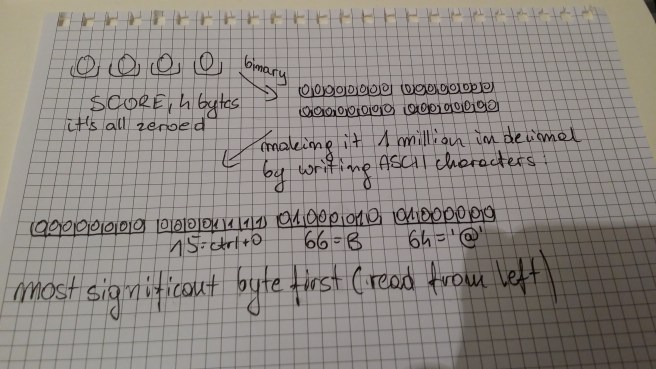 What I meant was “making it 1 million from decimal to binary”


You must be logged in to post a comment.